Creating great content means being detail-oriented. You’re in charge of everything from concept to delivery, and from visuals to audio.
When it comes to recording great audio for a video or podcast episode, garden-variety detail orientation isn’t going to cut it. You must be the master of your surroundings and your concept. This ranges from eliminating distracting background noise, avoiding silence gaps, predicting how your interviewees will sound when responding to surprising information, and controlling for loud or quiet voices.
First, pick your device: you can use either smartphones or digital voice recorders. While the smartphone is easily usable, the latter yields a more professional output and is better for interviewing people, recording lectures, or gathering field notes.
However, it’s important to note that there is much more to improving your audio quality than just the choice of device you use for recording.
In this post we’ll take a comprehensive look at how to improve the audio quality of a recording as a creator. Read on to learn more.
11 steps to improve audio quality
You’ve written your story, sourced your interviews, and even spent a little time narrowing down options for intro music. But first, you have to get it all on tape.
Of course, you don’t just want it “on tape.” You want to achieve great audio quality, so good that it keeps your audience engaged.
Here, we’ve rounded up some tips that can help you produce great sound quality, regardless of your recording device:
1. Make sure your environment is quiet
Choose a quiet space. While recording, turn off fans, air conditioners, and other devices that can interfere with the sound quality.
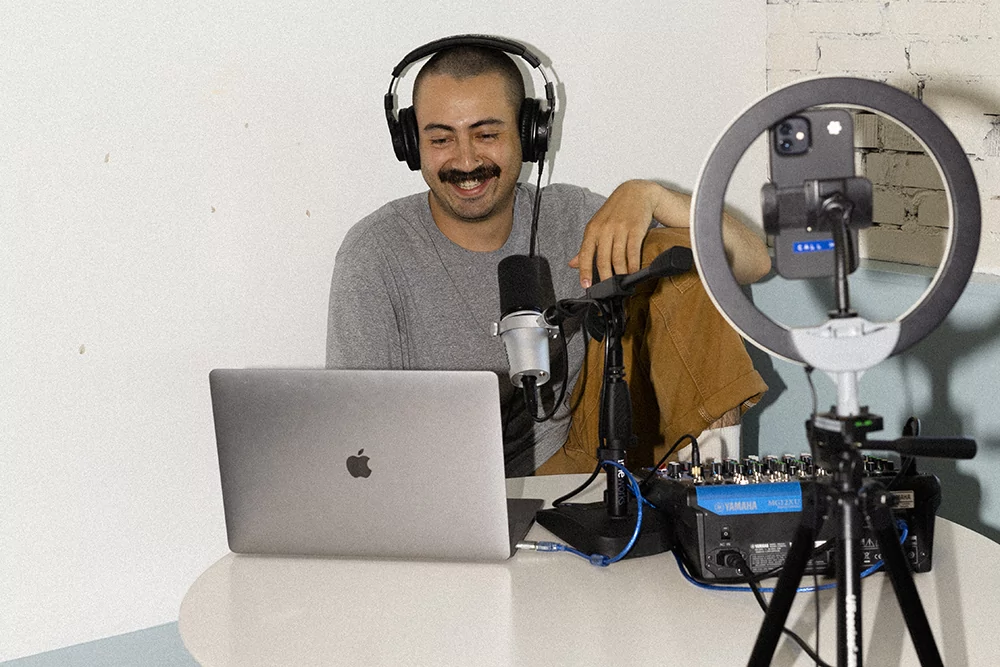
2. Headphones, please
Even if your recording space is silent, headphones are essential to help you identify faint sounds that you can erase during the editing process.
While headphone caliber ranges pretty widely, we like the Sennheiser Momentum for its clean look and top-notch audio quality.
3. Limit echos
Audio recordings are often marred by echoing sounds because of their recording environment. Echoes occur in large, sparsely furnished rooms where hard walls rebound sound.
The optimal recording space is small, with soft furniture to help absorb sound. Slight background noise will be muffled in your audio recordings, making for improved audio quality in the final edit.
If you’re looking to create a permanent recording space, consider dedicating a tight area such as a closet or small office.
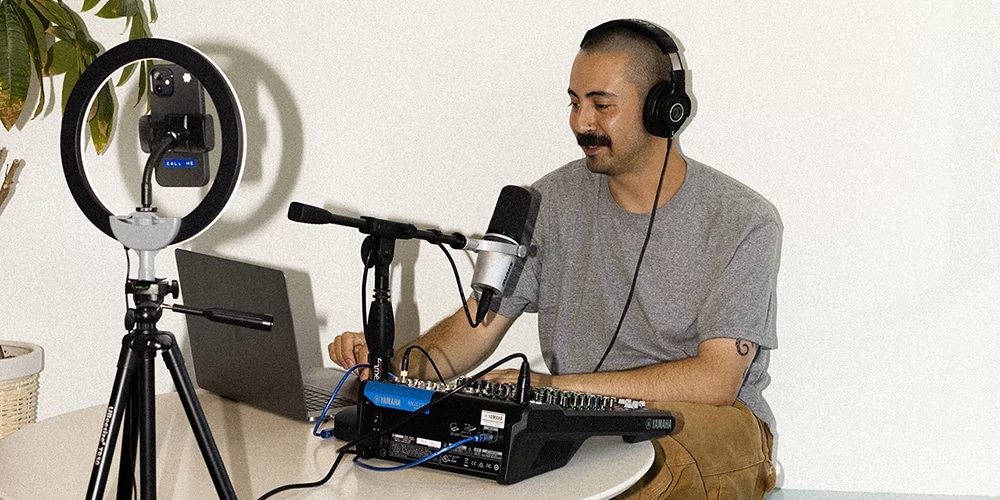
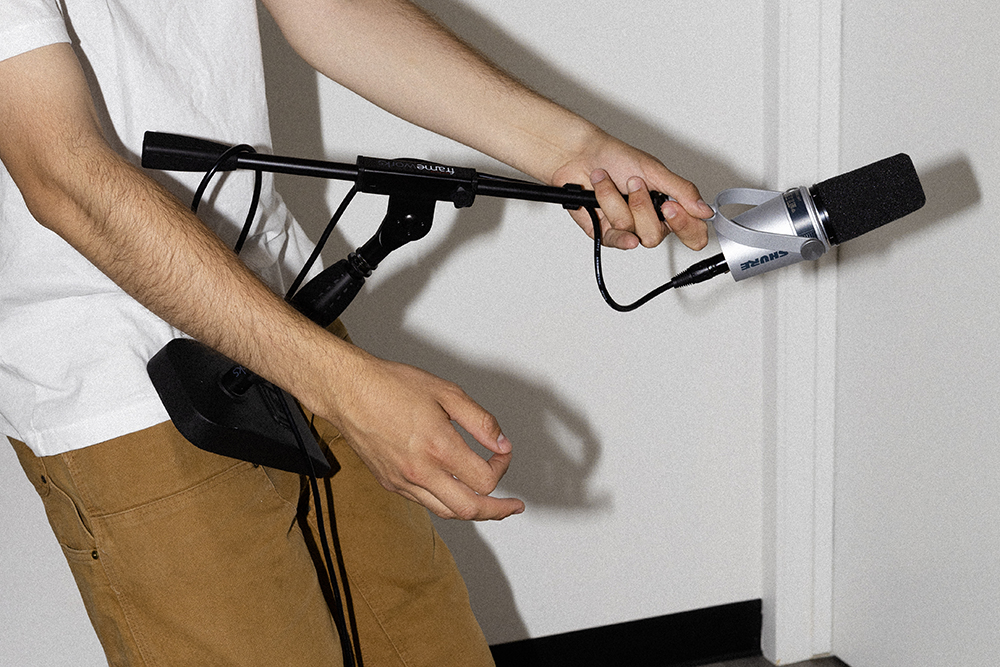
4. Invest in a good microphone
While smartphones have built-in microphones, they are not best for recording professional-quality audio. A quick and easy solution is using affordable external USB mics, such as the Audio-Technica ATR2100x-USB.
However, USB mics can be challenging if you use two simultaneously, such as during interviews or in-field reporting. In these instances, use an XLR mic to split speakers into separate channels. We like the Shure MV7.
5. Ensure your microphone stays put
Sometimes, the best audio recording equipment is simply … a tripod.
Microphones are sensitive: keeping your mic steady during recording will help produce a much cleaner audio track.
A microphone stand, such as the Rode PSA1, will help keep your microphone in place while freeing up your hands to take notes while recording.
6. Pay attention to your plosives
Plosives are consonants that release air from your mouth. We’re talking “p,” “k,” “t,” etc. The bursts of air can interfere with your audio.
An easy resolution? Invest in a good pop filter. Readily made pop filters are available at most audio equipment stores and online, sometimes even at just under $10.
7. Position yourself correctly
An oft-overlooked culprit of poor audio recording quality? Bad mic posture. Avoid leaning back against your chair or getting too close to the mic. Moving, fidgeting, and foot tapping often need to be edited out in post-production.
When you hit record, be sure to sit upright with a relaxed posture. Keep your mouth four to six inches from your microphone, and don’t forget to enunciate.
Your audio quality is going to sound like the person who’s recording it: confident, loose, and on top of their recording space. That’s right, your body is one of the most important pieces of your audio recording software.
8. Use mixers when more than one person is recording
Microphones can help you produce outstanding recordings when you’re alone. But if you’ve got a guest or interviewee, consider using a mixer to split audio channels.
For instance, if one person speaks loudly and the other softly, you can adjust the volume for each person individually during post-production.
Don’t skimp on two great mics: you will require one XLR mic per person so that you can edit each speaker’s voice accurately in the final edit.
9. Test all your equipment before hitting record
Even if you record audio often, testing your equipment every time before starting is essential. The best way is to make a test recording, play it back, and ensure all your equipment works perfectly.
You’re also looking to minimize your background noise, control for glitches, and make sure that you’re on top of any new additions to your kit.
While a test can feel like an extra step when you’re keen to get moving, it can save you hours — if not days — of work.
10. Set your decibels correctly
Decibel input volumes can cause a shrill noise in your audio recording, especially if you set it too high. To select your “gain” (AKA your decibel input volume) correctly, simply:
- Position your mouth four to six inches away from the microphone and speak loudly.
- Check the audio level in your audio recording software to ensure that your voice does not cross the upper limit as displayed on the software interface.
- If the decibel levels cross the threshold, decrease your gain until the peaks no longer cross the red line.
Performing this test prior to every recording will significantly improve your audio recording.
11. Invest in professional editing services
No matter how attentive you are to your audio recording, audio editing software provides polish that a raw audio file rarely achieves.
Coughing, deep breaths, a pause while you search for the right words — they don’t sound smooth or professional, even if you do.
Editing can fix such natural occurrences within or beyond control. Tools like Descript, Adobe, Audition, and Audacity are popular for editing voice recordings. If you’ve got the budget for it, hire a professional editor to help you turn your audio file into a polished final product.
Bonus tips: Practice your soft skills
While the technical aspects of recording are essential to improve audio quality, tons of other factors can also influence your final output.
Emotional state
Are you happy and calm? Or anxious and eager to get this over with? Even seasoned voice actors have difficulty disguising their tone and tenor against a high-quality mic.
Practice getting into a relaxed headspace before you sit down at your recording space. Your audio quality will thank you.
Physical health
Don’t underestimate the physical toll of producing quality audio. Are you well-rested? Have you been drinking fluids? Is your throat feeling a little sore? Being alert and healthy will come across in your final cut — just as being groggy or raspy will.
Stay hydrated
The best voice actors know that keeping their instrument lubricated is key to getting the best audio quality. And the same applies to video and podcast creators. Even on days when you aren’t recording, aim to drink at least 24 ounces of water. Your throat will thank you.
Practice, practice, practice
The cheapest thing you can do to improve audio quality? Practice impeccable enunciation. Audio recording software can only do so much. Sure, you can remove background noise and fix some audio distortion, but even the best audio recording software can’t compensate for unclear speech.
Confidence
Hype yourself up! Look in the mirror and say “I got this.” Stumbling over your words or being reticent with your line of questioning will make for a less engaging listen.
Knowledge and preparation
The better prepared you are to speak on your topic, the smoother your audio recording and the more interesting your story will be. So bone up on your subject and be ready for it to take you down a path you didn’t script.
Technical mastery
Getting comfortable with the recording process and your equipment will allow for fewer takes, and that means saving you lots of time.
Blanket your space
We said it once and we’ll say it again: limiting background noise will shave hours off your editing time.
Create a soundproof studio in a small space with soft walls. Blankets hung against the walls in a closet will go a long way in helping to remove background noise and produce a high-quality audio recording.
Audio quality reflects content quality
Recording audio is as much about getting the best sound quality as it is about dialing in the content of your project. Poor audio quality takes away from a great story, but great audio quality can punch up a project that needs a little love.
Take care to produce an excellent recording environment, and your content will reap the rewards.
In short: preparation is key
Improving audio quality requires addressing several factors ranging from the preparation of your space, your physical and mental state, and knowing the intricacies of your recording equipment.
If you’re serious about producing a high quality audio recording, don’t just whip out your phone. Invest in a digital voice recorder, record content in batches, and get professional equipment and editing support to ensure high-quality audio production at scale.
Arguably the most important element? Your level of prep. No matter how good your sound is, if you haven’t taken the time to research your topic, no expensive mic will save you. So, before you start recording your podcast or video, be sure you’re prepared to discuss whatever topic it is that you intend to dive into. Your audience can hear it.
Follow The Leap on TikTok, Instagram, and YouTube for more content creation tips. We also make a newsletter.