You don’t need to be the next Quentin Tarantino or Bong Joon-ho to shoot your own YouTube videos at home. With the right equipment, a little ingenuity, and a story to tell, anyone can find an audience and carve out a solid living for themselves online.
But finding the right equipment is easier said than done. One second you’re looking for cameras, editing software, lighting, microphones, and the next you’re vanishing down the rabbit hole of online reviews.
Don’t worry, though—because we’ve got you covered. This article breaks down all the essential pieces of equipment for your DIY home studio at two different price points: budget and professional. You’ll leave with a wish list of equipment that’ll help you bring all your video ideas to life.
Here’s some shortcuts, if you’re eager to skip to a specific section:
- Is my iPhone part of my YouTube video equipment?
- 5 must-haves: gear and equipment for starting a YouTube channel
- Nice-to haves: other equipment for YouTube beginners
Is my iPhone part of my YouTube video equipment?
Great question—and the answer is yes, you can absolutely make a YouTube video with your phone! Here’s a video that Thinkific Expert, Rick Bains created on this exact topic.
The newest generations of iPhones come with 12MP cameras, which is a sufficient resolution for shooting YouTube-quality videos. (In fact, some music video directors are even shooting professional-level content on them).
Even if you’ve got a DSLR, you may want to set up your iPhone so you’ve got a second camera angle to cut to while editing your YouTube videos. The variety will help keep viewers engaged, and if you’re shooting on a newer iPhone, nobody is going to notice. You may run into storage issues, though, so be prepared to do a lot of exporting.
5 must-haves: Gear and Equipment for starting a YouTube Channel
1. Camera
There are no videos without cameras. Most brand-new DSLRs and mirrorless cameras will set you back a pretty penny, but the crystal clear video you’ll get is worth the investment. Plus, you can always score deals on certified pre-owned forums like KEH and MPB, which sell gently used gear.
- Best Budget Camera: Panasonic Lumix G7
The Lumix G7 is the perfect entry point for new creators. With a micro four-thirds sensor, this camera is more compact than a full-frame DSLR—and perfect for long shoots.
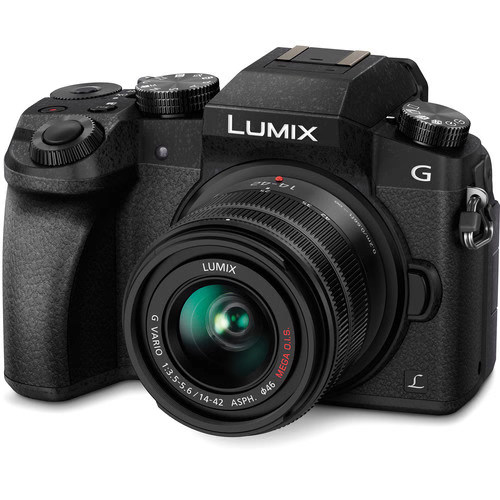
Many entry-level cameras can’t shoot resolutions above 1080p, but the Lumix G7 shoots in 4K. With a 16 MP sensor, you’ll also be able to capture high-quality stills, too.
Price: $697.99
Related: What’s the Best Camera for YouTube
- Best Professional Camera: Sony a7IV
The Sony a7IV is top-of-the line for video and stills alike. With a 33MP full-frame sensor, full-width oversampled 4K from 7K, and 10fps shooting in RAW, this camera is the best hybrid Sony’s got.
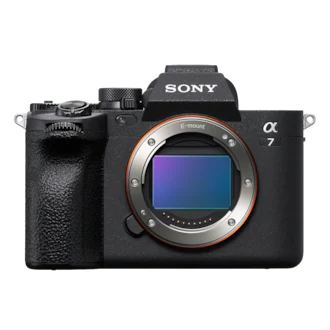
Unless you’re shooting feature films, you’ll never outgrow this camera. And you’ll create top-notch YouTube videos in the meantime.
Price: $3,199.99
2. Microphone
Sound quality can make or break your YouTube videos, and every YouTuber needs to invest in a decent microphone of some sort. Most DSLRs don’t have good built-in microphones, so you’ll want to make sure the audio quality matches the video quality.
- Best Budget Microphone: HyperX SoloCast
For less than $60, you won’t find anything better than the HyperX SoloCast microphone. Designed for streamers, gamers and YouTubers, this cardioid mic has a frequency response from 20-20,000 Hz, picking up every hearable frequency.
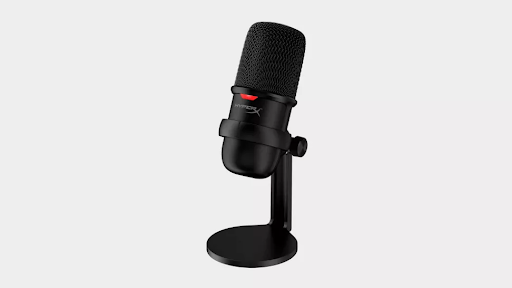
The microphone comes with an adjustable stand, a tap-to-mute sensor, and a boom arm for adjusting your placement. Beginners: you can’t go wrong here.
Price: $59.99
- Best Professional Microphone: Shure MV7
Shure’s MV7 microphone is modeled on the iconic SM7 series, which was used to record albums like Michael Jackson’s Thriller and Green Day’s American Idiot. This microphone has USB and XLR outputs for use with laptop and physical interfaces, and has auto-leveling that will saves you from stressing about sound.
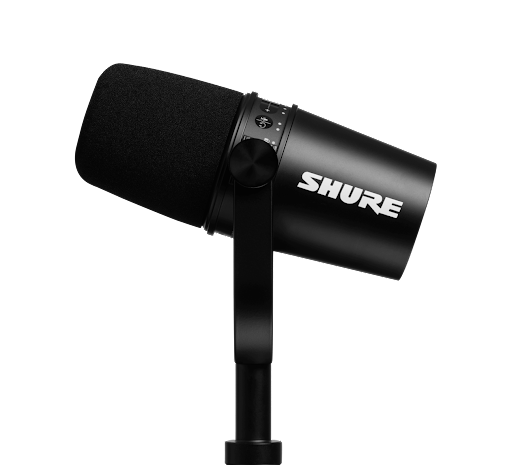
The price is steeper than that of the HyperX SoloCast microphone, but the difference in sound quality is noticeable. If you’re publishing a lot of videos, this will be the one for you.
Related: The Best Equipment & Software For Creating Online Courses
3. Tripod
After a camera and a microphone, a tripod should be one of your next purchases. This will make it easier to get the right framing for the shots in your YouTube videos—so you’re not propping your camera up on a pile of books.
- Best Budget Tripod: Joby Gorillapod
The lightweight Joby Gorillapod is the best budget tripod for course creators and at-home videographers. Weighing in at just three pounds, the Gorillapod can support up to eleven pounds of equipment—and is small enough to comfortably fit onto your desk.
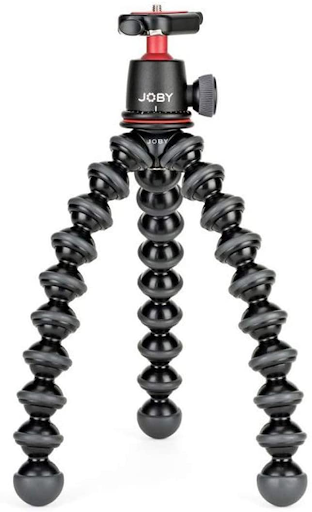
Price: $53.52
- Best Professional Tripod: Manfrotto 190XPRO 3-Section Tripod
Manfrotto’s 190XPro 3-Section Tripod is made of solid aluminum, and is flexible enough to work for any filming scenario. The legs extend out, so you can lock off your shots up high, and the movable center column allows you to get ground-level shots too.
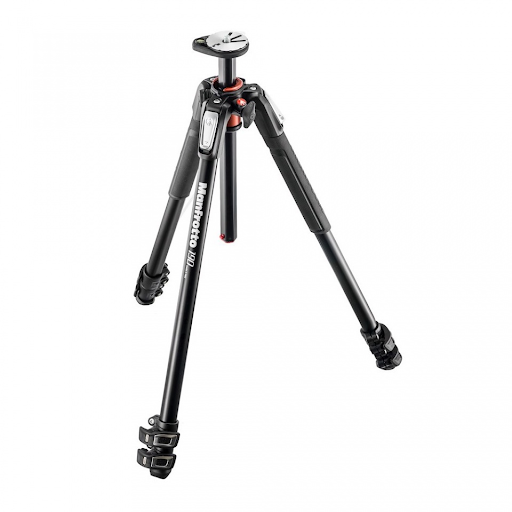
The 190XPro’s legs lock off to keep your camera safe, and you can mount it with the head of your choice—like a ball head or a fluid head for panning. (Plus, it’s not even that expensive.)
Price: $319.95
4. Lighting
Have you ever taken a video or photo and wondered, “wow, this looks so dark” or “why is the background all white?” In both cases, this means you’re in need of better lighting.
Your lighting creates the atmosphere of your videos, provides clarity, and centers viewers’ attention on the important parts. For a home YouTube studio, you won’t need too much lighting, but a little goes a long way.
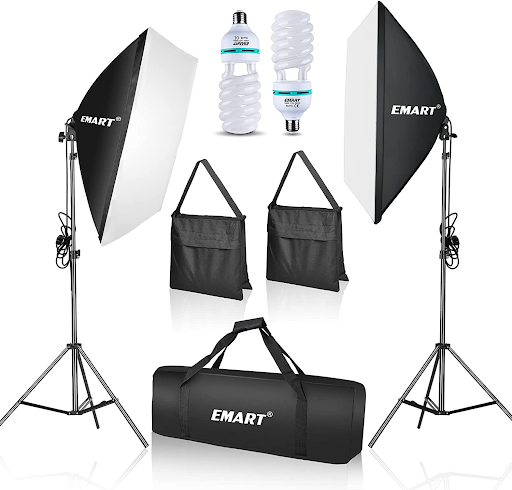
- Best Budget Lighting: EMART Umbrella Photography Lighting Kit
This lighting kit comes with two softbox lights, two sandbags for weighing your lights in place, and a portable tote to move your kit from place to place. Perfect for cutting shadows, reducing glare, and getting even lighting.
Price: $99.00
- Best Professional Lighting: Westcott Basics 3-Light Softbox Kit
This kit was given a Hot One award by Professional Photographer magazine, and it’s the perfect entry point to professional-level gear. This three-light kit is fully dimmable, and takes energy-efficient LED bulbs.
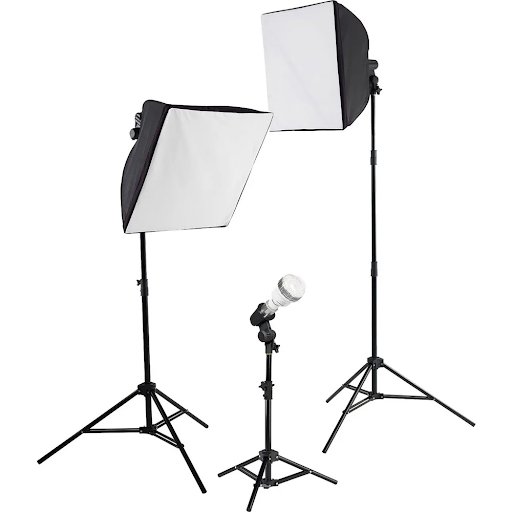
Unlike many softboxes, the uLite modifiers take just seconds to modify, and this kit is certified by the CSA for safety. That’s really important, because lighting can get quite hot, especially during long shoots. Looking good while staying safe—what’s not to love?
5. Editing software
Now that you’ve got everything you need to shoot your own YouTube content, you’ll need to edit your videos. And luckily, there’s two central choices out there on the market—one for Mac only, and one for both Mac and PC. (DaVinci Resolve and Final Cut Pro are also good, though.)
Here are a few popular choices, but for a complete list, Check out this in depth guide we created on the best video editing software.
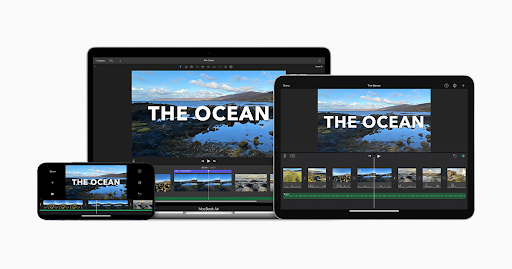
- Best Budget Editing Software: iMovie
iMovie is only available on Apple devices, but it’s the best budget editing software out there. The interface is sleek and intuitive, and there’s a swath of transitions, text effects, and filters you can use to bring your videos to life. For an editor on a budget, this is a great starting point.
Price: Free
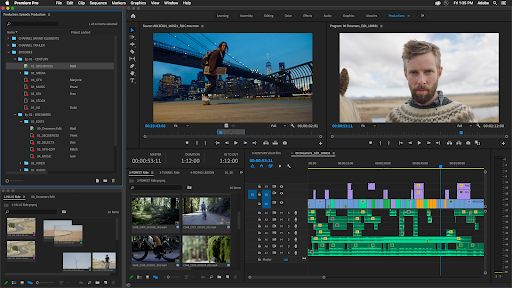
Best Professional Editing Software: Adobe Premiere Pro
Everyone and their mom has Adobe Premiere Pro—and for good reason. The industry-standard interface is clear and flexible, with unlimited multicam angles and every editing tool under the sun. (You’ll even be able to auto-generate captions, which is important for shooting YouTube content.)
Nice-To Haves: Other Equipment for YouTube Beginners
Your camera, microphone, lighting, tripod, and editing softwares are vital, but there’s other nice-to-have gear items that you can use to make your course content more distinctive.
Backdrop
A distinctive backdrop can help to make your YouTube videos more distinct, and set you apart from other creators. Backdrops aren’t always an item you have to buy, either—sometimes you can use the space around you to great effect.
Here’s a few ideas for backdrops:
Color Gels
Adding colored fill lights can also add some style and depth to your YouTube videos. The extra visual intrigue will help you hold viewers attention, and set you apart from the thousands of YouTubers shooting with flat, uninteresting lighting.
And as long as you already have lights, this doesn’t need to be a massive extra cost. Many color gel packs are under $30 on Amazon. They’ll stick right onto your regular lights, and turn normal white lighting into moody cinematic lighting.
So, what’s next?
By this point, you’ve got all the essentials, and you’re ready to start shooting YouTube videos.
Soon, you’ll be ready to start monetizing the audience you’re creating around your channel.
The fastest, most effective way to monetize your YouTube and build passive income is to start selling digital products.
That’s where The Leap comes in.
The Leap caters specifically to creators who want to monetize their knowledge and expertise by transforming them into digital products. That’s because our authoring tool is kitted out with everything you need to create the best and most engaging digital learning products, from mini-courses and guides to tutorials and challenges
Basically, The Leap makes kickstarting the creator monetization journey easy. Our tool empowers you to earn more than just your first few dollars, but to create a sustainable income engine by turning your expertise into profitable digital products.
Make the jump to The Leap. Try our all-in-one creator store for free today.

