Technology has come a long way over the past few years, and fortunately, it doesn’t take a lot of equipment or software to create an online course. And you don’t have to break the bank to get everything you need either. Whether your budget is a few hundred or a few thousand dollars, it is definitely possible to create an online course that your students will love.
After checking in with our community of online course creators and other members of the Thinkific team, I’ve compiled a complete list of the most popular equipment and software that people are using to create their online courses.
I’ve organized all of these recommendations into specific categories (microphones, accessories, screen recording programs, and so on). Within each category, I’ve listed the recommended products/programs in order from least expensive to most expensive.
Before you dive in, I will say that you absolutely do not need the best and most expensive equipment and software to create an online course. Most of the successful online course creators that we’ve spoken to all created their first course using pretty basic and inexpensive setups.
Related: Learn how to set up a DIY home video production studio for cheap
Once they launched their first course successfully, they used some of their earnings to purchase higher quality equipment, and from there, they recorded new content for their course, recorded new courses, or both.
Deanne Love from HoopLovers, for example, recorded her first course in a park using her iPhone. With the revenue she earned from her first online course, she purchased more equipment that she used to re-shoot her video lessons and later to create more courses for her audience.
So if you’re about to create your first online course, don’t feel compelled to spend thousands of dollars on equipment and software in order to get started. It is more important to actually create your online course, publish it, and get feedback from your students than it is to wait until you have all the best equipment before you record anything.
Once your first course is created, you can always circle back and re-record your lessons, add new lessons, or create an entirely new course with a higher production value. Stepping stones, stepping stones.
Skip ahead:
- The best microphones for online teaching
- The best cameras for recording online courses and vlogging
- The best lighting and accessories for online creators
- Software tools for online course creation
- How to set up the perfect recording environment
- What equipment and software are you using to create your online course?
- Online course equipment FAQs
The best microphones for online teaching
Whether your course lessons are audio only, voice-over slides/screen sharing, or live video, it is very important to use a good microphone to record your voice. Even if you have great content, if your audio quality is poor, your student’s learning experience will suffer.
Bottom line: Use the best microphone you can afford. Do not use the built-in microphone on your laptop or mobile phone.
You should also know that most professional microphones are either dynamic microphones or condenser microphones. Dynamic microphones are great for drowning out background noise. Condenser microphones tend to pick up everything, so only use them if you are in an enclosed space with minimal background noise while recording.
Here are several microphones that we recommend:
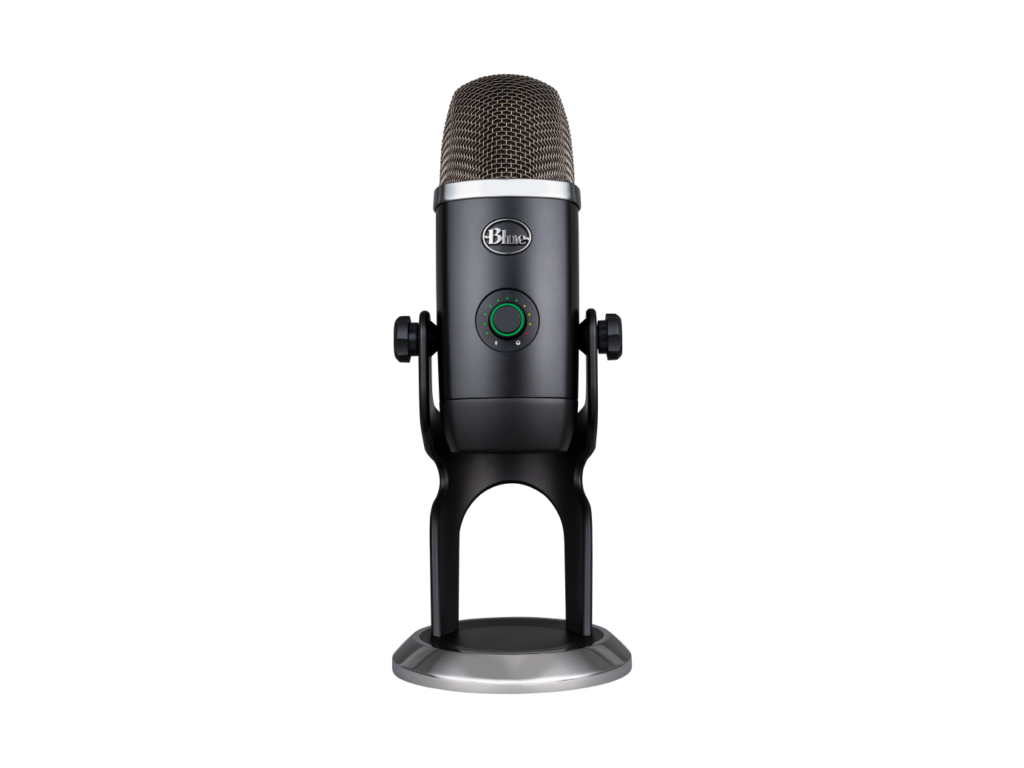
Price: $139
Top features:
- Mute function
- Voice-activated recording
- Four-capsule audio array
- Customizable LED metering
Let’s kick things off with one of the top picks for creators, especially YouTubers and podcasters: The Blue Yeti X.
It’s a simple USB desktop microphone that gives you total control over your audio delivery. It has four sound capsules that you can control to vary your audio output — think of it like having four microphones in one. There’s also a gain dial with fluctuating lights indicating the loudness or softness of your voice and the level of amplification applied to it.
Here’s how one user describes their experience with this microphone:
“This mic is so good I purchased a second one. Excellent for podcasters as long as you use the correct mic settings. The settings button is on the back. HIGHLY RECOMMENDED. The sound quality is unmatched. Bit on the heavy side, though. I also recommend you get the carrying case.”
Keep in mind that the Blue Yeti X isn’t a studio mic, so its noise cancellation feature isn’t that great. Also, it’s a desk mic meaning it’s not designed for hand-holding — although its base is detachable. It might be uncomfortable to carry it around.
You can buy the Blue Yeti X from online stores, including Amazon and Logitech.
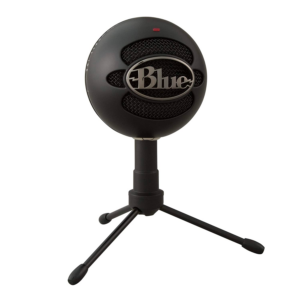
Price: $49.99
Top features:
- Custom condenser capsule
- Cardioid pickup pattern
- Adjustable desktop stand
- Discord-certified
This microphone should be on your radar if you plan to host live webinars, online training or one-on-one coaching sessions.
The Blue Snowball iCE microphone comes in a stylish retro design that boosts your studio’s visual appeal and looks great on camera too. You can also connect it to your PC via USB — just like the Blue Yeti Plus.
It’s great for mobility too. The Blue Snowball iCE is small enough to fit into your backpack, which works well for digital nomad creators. It also has a built-in tripod that lets you move it around your desk easily.
Here’s what one user says about it:
“The Blue Snowball is a great microphone for anyone who is looking to talk online via Discord, skype, or even voice chat in the game. I personally use it to talk on Discord with buddies and record my YouTube videos.
The voice quality is perfect for this budget and price range. My voice will still get picked up even if I’m leaning back in my chair or if I step away from my computer to pick up something in the room. It is definitely an upgrade compared to my last microphone, which was my laptop’s included microphone that would always pick up the laptop fan and wouldn’t grab my voice unless I spoke directly into it.”
The Blue Snowball is perfect for creators who want to have a simple audio setup. But it isn’t suitable if you’re working with a complex setup. For example, you cannot adjust its level of amplification.
You can buy this microphone on Amazon or Logitech.
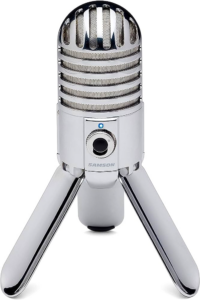
Price: $45
Top features:
- Fold-back legs design
- Large, 25mm diaphragm USB studio condenser microphone
- Out-of-box recording
- Cardioid pickup pattern
Consider buying this microphone if you want to deliver quality audio for your video course, audiobook or podcast.
The Samson Meteor is a professional-quality USB microphone with a headphone jack for easy listening. It picks up sound directly in front of the microphone, which minimizes external noise. It might not give you top-notch noise cancellation, but it’s a lot better than depending on your PC’s built-in microphone.
The Samson meteor mic works with almost all devices, meaning you don’t have to bother about changing your entire audio setup. You can connect it to any computer, and it is compatible with the majority of digital audio workstations, including Samson Sound Deck and GarageBand.
Here’s one user’s experience with this microphone:
“The Meteor is a great microphone. The sound it captures is rich and natural. I feel like the quality is on par with microphones that cost twice as much easily. The size is great. It is a lot smaller than the snowball and can fit easily on my desk with multiple other peripherals. I also use it to record when not at my desk, and it is very easy to hold and can be set on almost any surface. Each leg has a rubber “foot”, which prevents them from scratching any delicate surface and has the added benefit of holding the microphone in awkward directions if needed.”
Some devices might not be compatible with the Meteor, so make sure you double-check with the sellers before placing an order.
You can buy the Samson Meteor microphone on Amazon.
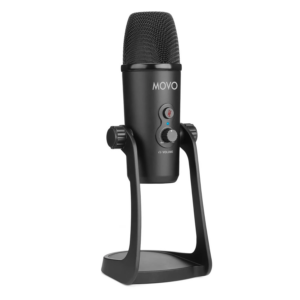
Price: $110
Top features:
- High-fidelity audio
- Plug-and-play microphone
- Headphone monitoring and volume control
- Solid metal build for stability
If you’re creating different audio products, like podcasts and voiceovers, you’ll love having the Movo UM700 in your audio arsenal.
It’s a versatile desktop mic that lets you switch through different audio settings depending on your audio requirements. For example, you can switch to the cardioid setting to record a voiceover and the bidirectional setting to host a podcast.
It’s easy to use too! You only need to plug it into your computer for quality audio for your audio sessions. Here’s one user’s experience with the Movo UM700:
“A USB microphone with excellent audio quality, also good as an entry-level for musical recordings. It’s quite heavy and stays solid on the desk, making it difficult to knock it down accidentally. It’s a plug-and-play microphone, you won’t need additional software (which Movo doesn’t even provide; there’s little you can change). But the positive thing that you can do, you can do on the microphone directly: change gain levels, the polar figure, the mute, the volume for the headphones (those that can be attached to the microphone directly for testing).”
The Movo UM700 is quite heavy, so if you’re a traveling creator, it might not be the right choice for you. You can buy it from the Amazon store.
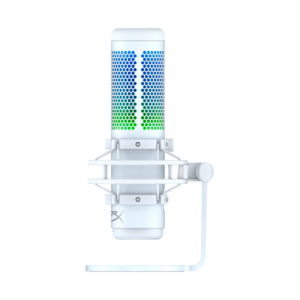
Price: $189
Top features:
- Mute sensor with LED indicator
- Anti-vibration shock mount
- Four polar patterns
- Mount adapter, built-in pop filter, and headphone jack
The HyperX mic is a versatile and easy-to-use Condenser microphone. You can adjust the audio setting in four different ways depending on your sound quality needs.
You’ll love this mic if you care for aesthetics. Its radiant RGB lighting adds beautiful color to your workspace and overall camera appearance.
Here’s what one Amazon customer says about the HyperX QuadCast S:
“This mic gives not only a cool gamer feel but the fun aesthetic of the RGB color! It’s super easy to use with its downloaded software, its mute button on top(which changes to off-color to know it’s off), its easy-to-use gain bar, and more. This is one of the best mics used for beginners and vets for streaming and recording. it has 4 settings as well to produce the best sounds possible for any job! Deff happy about choosing this mic!”
Some users say the microphone’s color scheme quality can be better. Beyond that, it’s a solid-sounding mic for a reasonable budget.
You can buy the HYPERx QuadCast S microphone on Amazon.
Lavalier microphones
Lavalier microphones (sometimes called lapel microphones) are microphones that you use specifically for recording live videos. For example, if you speaking directly to a camera and don’t want to have to hold a microphone up to your mouth while you’re speaking, you would use this type of microphone. You can clip these microphones to your shirt where they will barely be visible by the camera and have complete use of your hands while you’re speaking.
Here are a few options:
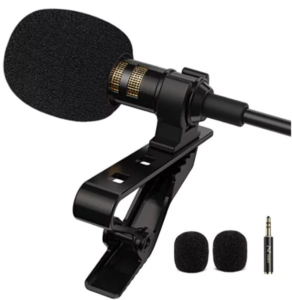
- PoP Voice Professional Lavalier Microphone: An extremely cost-effective choice with an 18-foot cord to plug into your device for recording. Connects via a headphone jack and works with most devices. A good choice for getting started with lapel microphones.
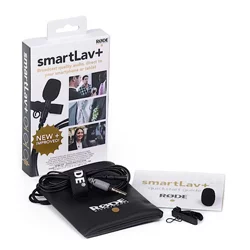
- Rode smartLav + Lavalier Microphone: Professional grade Lavalier microphone with discrete design. This is a great choice if you’re looking for broadcast-quality audio for your online course.
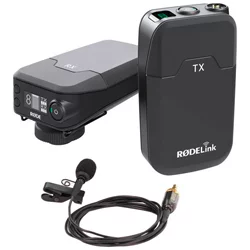
- Rode RodeLink FM Wireless Filmmaker System: If you’re looking for a wireless option, this Lavalier microphone from Rode is a good choice. The battery life is approximately 30 hours, with an easy-to-use transmitter and receiver.
The best cameras for recording online courses and vlogging
Many online course creators record live videos for their video lessons. This can be accomplished with a mobile device (like an iPhone, for example). But for a higher video quality, you may want to invest in a digital camera or webcam for any live lessons. We’ve listed several options below:
Panasonic Lumix G7 Mirrorless Camera
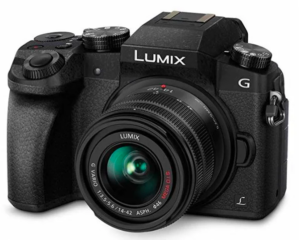
Price: $699.99
Top features:
- 4K video capture
- High-Resolution Viewfinder and LCD Display
- Controls for flexible photography and videography
- Still video option
Originally for photography, the Panasonic LUMIX is a great buy for creators looking to produce quality YouTube videos, webinars, and live streams without breaking the bank.
Let’s get into the features. The Panasonic LUMIX has 4k video capture capabilities that let you capture high-resolution images and videos. It also has intuitive controls that allow you to adjust focus and shutter settings. Here’s one user’s experience with this camera:
“I use this camera for vlogging, and I love it. Considering the features and quality, it beats the pants off of just about every camera out there for the price I got it. The pictures and colors are stunning. Sharp, crisp, and clear. The autofocus is plenty fast and accurate except in low light, where it hunts and pecks a bit. The controls are intuitive and easy to get at. The record button is flush and hard to find at times, but you get used to it, and no worries about accidentally recording. Plenty of Fn buttons to program your favorite features and functions for quick access. The lens is nice and compact, providing plenty of field of view.
Also, battery life isn’t bad. I can shoot for several hours on and off without changing batteries and leave the camera on during most of it. Aftermarket batteries are cheap and easy to carry. The built-in mics aren’t bad either if you can protect them from the wind. It’s not much bigger than the various point-and-shoots (Canon G7X or Sony RX100), but this one has a mic input and a fully articulating screen. A big bonus for vloggers.”
Something to note is that the camera’s image stabilization feature isn’t that great, meaning you might struggle with blurry shots at any slight movement.
You can purchase the Panasonic LUMIX from Amazon.
Sony ZV-1
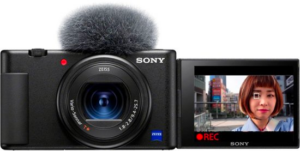
Price: $749.99
Top features:
- Eye Autofocus
- Advanced image stabilization
- High-resolution 4k HDR recording
- Built-in WiFi
- Single burst shooting mode
The Sony ZV-1 should be on your radar if you’re a digital nomad creator (like a travel blogger) and don’t have the budget for expensive lenses and cameras. It’s easy to carry around and captures high-resolution images and videos quickly.
Many vloggers appreciate the camera’s 3-inch touchscreen display because it helps them adjust filming and capture unique angles, especially for moving objects. After recording, you can share the footage to your mobile device directly, edit and upload it on your social accounts or video hosting software.
Here’s how one user describes it:
“The Sony ZV-1 is the perfect camera for creating content. There’s a button that gives you that professional-looking, defocused background with just one press. It also has a product showcase setting that allows you to focus on objects instantly. I love that I can easily share videos and photos to my phone right away through the free mobile app Imaging Edge too.”
Some creators have complained about the camera’s file transfer speed. Also, it doesn’t have a built-in flash, which might affect the quality of your videos and pictures — especially at night.
You can purchase the Sony ZV-1 camera online from BestBuy.
Canon EOS Rebel T7
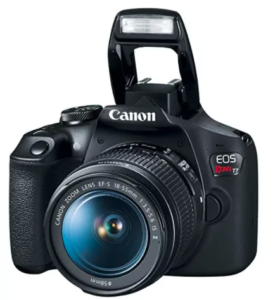
Price: $479
Top features:
- Built-in WiFi
- Optical viewfinder
- 24.1 MP still resolution
The Canon Rebel is a great beginner DSLR with 1080p HD video. It’s equipped with built-in wifi for easy footage sharing, making it a convenient camera for online course filming. It also has an image stabilization feature for clearer videos and pictures.
Here’s what one user says about the Canon Rebel:
“This is a very good camera for beginners and is always powerful enough for broadcast quality photography and video. A big bang for the buck!”
The Canon Rebel isn’t compatible with all operating systems, so check with the seller (and do your research) before coping one. You can buy this camera from Amazon.
Fujifilm X-T200 Mirrorless Digital Camera with Lens
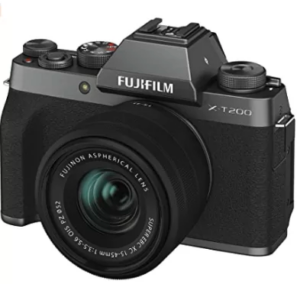
Top features:
- On-sensor phase detection pixels
- Mirrorless form factor
- Digital image stabilization
This investment is perfect for those looking to level up their video footage to professional quality. It boasts impressive 4k video capabilities with stabilization, color correction, in-camera editing, and more.
Here’s one user’s experience with the camera:
“The Fujifilm is a very good camera. It has good features and build quality, even though it is made of plastic. It’s also lightweight, which is why I chose this model.”
In terms of the cons, some users say it requires lots of customization to match their specific recording needs. Also, its zoom feature isn’t the best on the market. If you have a small budget, you’re better off choosing a simple camera with core recording features — such as high footage quality and built-in flash.
You can buy the Fujifilm camera from Amazon.
The best lighting and accessories for online creators
Once you’ve purchased your microphone and camera, you’ll probably want to grab a few accessories to help you maximize the quality of your recordings. Here are a few accessories that will come in handy as you record your course content:
Microphone accessories
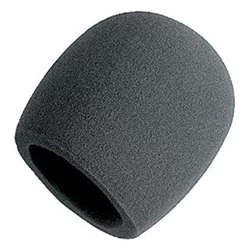
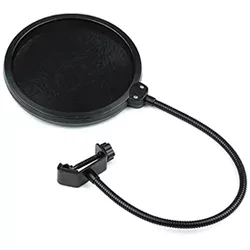
Regardless of which microphone you use, I recommend purchasing a few accessories to help increase your audio quality. Foam balls and pop filters help prevent that popping sound that occurs when air that is pushed out of your mouth hits the microphone.
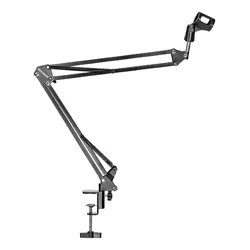
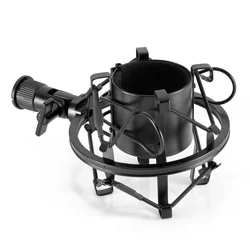
If you’re recording your course from a desk, microphone scissor arms will help you adjust the height of your microphone (so you can sit up straight or even stand up while speaking into it). Shock mounts help to minimize the sound of thumps and bumps. Foam wedges help to reduce echoes in whatever room you do your recording in.
- Foam Ball: Foam balls help reduce bacteria and spit on your microphone as well as interference noise. This one fits a regular hand-held microphone. Make sure the one you choose will fit your microphone type.
- Pop Filter: This filter reduces lisping or popping in your recordings. This model features a universal mount, so it should work with most online course recording equipment.
- Suspension Boom Scissor Arm: This microphone holder attaches easily to your desk so you can adjust your mic to exactly where you want it while recording.
- Microphone Shock Mount: This shock mount and pop filter combo reduces vibration as well as unwanted disturbances in your audio recording. It fits most microphones and includes a universal adapter for a simple setup.
- Acoustic Panels Studio Foam Wedges: These panels work to reduce noise in your recording space. Dampen external noise, as well as improve acoustics for your online course recording. A great solution for busy homes to achieve on-the-fly noiseproofing.

Headphones
Headphones come in handy during the editing process when you’ll want to be able to hear the audio that was recorded for each of your course lessons. They are also great for when you record interviews with other people. When you’re interviewing someone, you should be listening to them through your headphones and speaking into your microphone.
Here are a few headphone options:
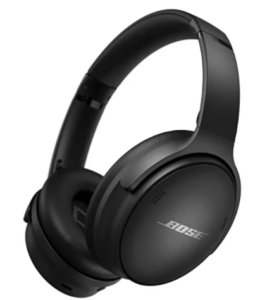
- Bose QuietComfort 45 Wireless Headphones: If you’re looking for a wireless option, these Bose headphones have superior sound quality with effective noise canceling to block out outside noise. It costs $238.88. Keep in mind that wireless headphones may have slightly more latency than a wired option when choosing your headphones.
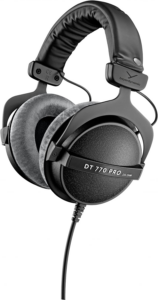
- Beyerdynamic DT 770 Pro: These headphones are perfect for video recordings, thanks to their high-resolution sound. They cost $169 on Amazon, but you can get them for a lower price from other sellers online.
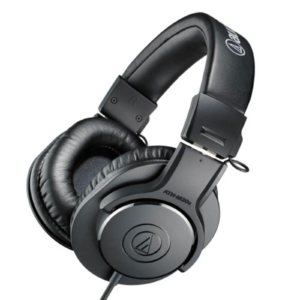
- Audio-Technica ATH-M20X Professional Studio Monitor Headphones: For only $69, you can cop these excellent noise-canceling headphones. The sound quality is great and makes editing so much easier.
Lighting accessories
Sometimes, natural lighting isn’t enough — that’s where lighting accessories come in. They’ll help you enhance the overall appearance of your video courses.
Here are a few lighting options you should consider adding to your course recording setup:
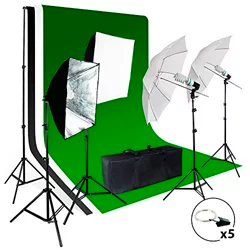
- LimoStudio Photo Video Studio Light Kit: This $69 kit includes reflector umbrellas and lighting, as well as stands and a case for transportation or storage. This is a fantastic equipment option to ensure your online course footage is well-lit, even if you’re filming in darker spaces.
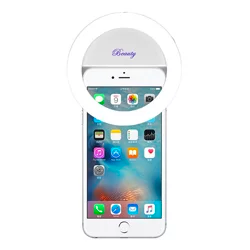
- Demetory Ring Light for iPhone: This ring light has 3 color modes and clips directly onto your iPhone for basic flattering lighting. It costs about $14 and is ideal for beginner vloggers and recording video courses.
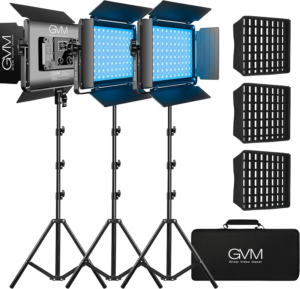
- GVM RGB LED Video Light: For $499, you get eight different scene lights, including party, disco, and paparazzi lighting. It also comes with APp Bluetooth control that lets you connect and operate the light from your smartphone.
Tripods
Tripods provide stability and support for your cameras when you record video courses or shoot YouTube content. Shaky video footage distracts your audience and makes your content appear unprofessional.
Here are two options depending on whether you’re recording videos with your phone or a camera.
- Cell Phone Tripod Mount: A mount to attach to your tripod so you can easily switch from camera to phone when filming.

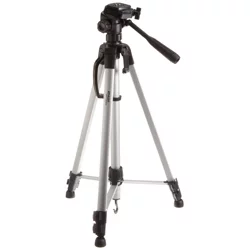
- AmazonBasics Lightweight Tripod: This tripod comes with a bag for carrying or storage and is adaptable to fit most cameras and phone mounts.
Software tools for online course creation
Recording your course is only one piece of the puzzle. You still need to finetune it into a presentable format and make it available to your audience. For that, creators rely on several software applications. Let’s highlight the most popular ones.
Screen recording software
An alternative to recording live videos for your course lessons is to record your computer screen as you work your way through a slideshow presentation (aka voice-over-slides) or while you demonstrate some sort of technical task, like teaching someone how to use a software program, for example.
Here are some popular screen recording programs:
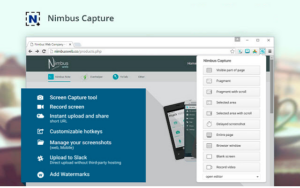
Nimbus Capture is a free Chrome extension that supports screen recording. It supports multiple options, including audio on/off recording, watermarking, and webcam recording. You can also edit the videos and convert them into multiple formats, such as gifs and MP4.
This app’s pro version costs $5 per month/user and supports advanced features like unlimited screen recording and more editing options.
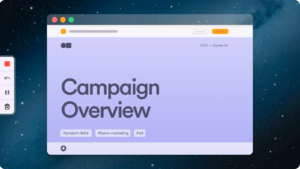
Loom is one of the most popular screen recording software around. The free version is best for sharing short video messages (up to five minutes long). So, you’ll need to subscribe to one of the paid packages to access advanced features for course recording.
The paid plans start at $15 per user/month and support unlimited videos and recording length.
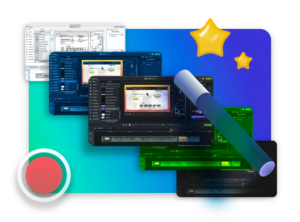
Camtasia offers a free trial and an intuitive interface for simple screen recording. The full version includes a video editor and costs $299.99 for lifetime access.

ScreenFlow prides itself on its high-quality screen recording, whether you are recording one or multiple screens at one time. This software is specifically for Mac computers. It costs $169, and you can get started with a free trial.
Audio and video editing software
Once you’ve recorded your audio and/or video content, you’re probably going to want to edit those recordings before uploading them to your online course. This is a process that can be outsourced or delegated to a professional, but if you want to do it yourself, here are some popular editing programs:
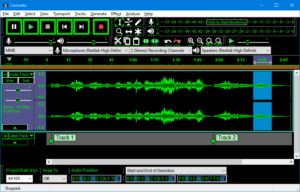
Audacity is an open-source video editing software. It has core editing features like sound adjustment, plug-in support, and audio/video effects. Newbie editors might find it challenging to use this software.

Anyone can edit videos with Veed. It’s easy to use and helps you produce professional video courses in minutes. You’ll particularly love its translation feature that lets you deliver content in multiple languages. You can also add subtitles for better content accessibility.
Veed has a free plan you can use for editing short courses. For lengthier content, you’ll need the paid plan starting at $12 per user/month.

Adobe Premier Pro is a professional-grade video editing software widely used in the film and television industry. It offers a wide range of features, including advanced video and audio editing, color correction, and integration with other Adobe Creative Cloud applications. You can get it for $20.99/month; there’s a free trial too.
It’s a great editing software for creators with advanced editing skills. If you’re a newbie, you’re better off with a tool like Veed.
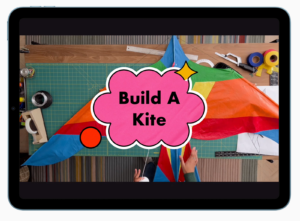
iMovie is Apple’s free video editing software — which means it only works on IOS devices. The platform includes audio and video editing with support for adding text or filters to your footage.
Course hosting software
After editing your video, the next step is uploading it to a hosting platform your audience can access easily. At this stage, you have lots of options, but the one you choose depends on your budget and hosting needs.

Pricing: There’s a free plan; the paid packages start at $36/month (billed annually)
Top features:
- Drag-and-drop course builder
- Course templates
- Live streaming support
- App integrations
Thinkific is a platform that enables individuals and businesses to create and sell online courses. It provides a suite of tools and features that make it easy for course creators to design, market, and deliver their courses to a global audience.
Thinkific allows users to build their branded online course websites, customize the look and feel of their course content, and manage various aspects of their online education business.
Learn more: How Dietitian Deanna Made $1.2M from Online Courses

Pricing: Vimeo has a free plan. The paid plans start at $20 per seat/month.
Top features:
- AI video editing
- Multiple format support including 4K, 8k HDR, and Dolby Vision
- Support for integrations including Google Drive and iMovie
- Content optimization
Vimeo is an online video experience platform that allows users to upload, share, and view videos. It was founded in 2004 and has since become a popular platform for creators to showcase their videos in a professional and customizable manner.
It also offers detailed analytics tools that provide insights into video performance, such as views, engagement, and audience demographics.
Pricing: Ruzuku is free for up to five students. Beyond that, you’ll need to pay for one of its packages starting at $99/month.
Top features:
- Payment integrations for Stripe, Paypal, and custom processors
- Mailchimp integration for email marketing
- Video streaming
- Course tracker
- Video course templates
Ruzuku is a simple platform for creating and hosting online courses. It focuses on ease of use and offers features like drip content and integration with other tools.
That’s not all. Check out these 29 free tools for creating and promoting online courses.
How to set up the perfect recording environment
Now that you have all the necessary equipment, it’s time to bring everything together to have a beautiful and functional recording studio. There are several things to consider as you do this:
- Select a quiet space: As much as possible, choose a room or area in your home that is quiet and free from external noise. For example, don’t set up your studio in a room facing the street — unless you have soundproof windows and doors.
- Invest in acoustic treatment: Next, you need to set up your space to control sound reflections and echoes. This includes using acoustic panels, bass traps, and diffusers to improve sound quality. If you’re on a budget, you can also use DIY solutions like the foam panels we talked about earlier.
- Make sure you have good natural lighting: Natural lighting balances out your studio’s colour temperature, which allows your visual elements — like skin tone and wallpapers — to appear sharper. Good natural lighting also means you save some of the money you would have spent on lighting equipment, especially when you have a small budget.
- Add aesthetic elements: Beautify your studio with wallpapers, flowers, candles, wallpapers — all of that stuff. They’ll improve the look and feel of your space and help you show up as your best self every time.
What equipment and software are you using to create your online course?
Well, that pretty much sums up the most common equipment and software that our community is using to create online courses.
Remember, you do not need the best and most expensive combination of equipment and software in order to create your course, especially if you’re creating an online course for the first time.
Everything I recommended in this post requires time and effort to learn how to use. When you’re first starting out, it is more important to actually create a course that helps others than it is to create a course with the highest possible production value. Creating content that adds value to the lives of your students should be your main priority.
Related: How to Create Epic Content Your Customers Will Love (Complete Guide)
Do the best you can with what you have. You can always buy more equipment and software to play with later.
Did we miss anything? Do you have any favorite equipment or software that is worth recommending?
Join our facebook community and let us know!
Online course equipment FAQs
Find answers to common questions about course creation equipment and tools.
What kind of microphones do I need for online teaching?
First and foremost, you need a microphone with clear audio quality and we highlighted a number of them in this article. You should also consider your specific needs, such as whether you’ll be moving around a round — in that case, you’ll need a light and easy-to-carry microphone.
What type of camera is best for recording online courses with clear visuals?
The Panasonic LUMIX and Sony ZV are two of the best cameras for recording videos for online courses. If you’re on a budget, you can record quality video courses with your smartphone.
How can I optimize my home studio for better audio and video quality?
Invest in good lighting and an aesthetically-pleasing backdrop. Also, record your videos in a quiet room to limit noise interference and use acoustic foam panels to reduce echoing.
What are the key factors to consider when choosing online teaching equipment?
Budget and features are two key things to consider when choosing an online teaching tool or software. Ideally, you should choose a tool that provides the core course creation features at a reasonable price.
Why not start your digital learning business with us? Create your course with Thinkific here.
This blog was originally published in May 2022. It’s since been updated in March 2024 to include the most relevant equipment recommendations!


