
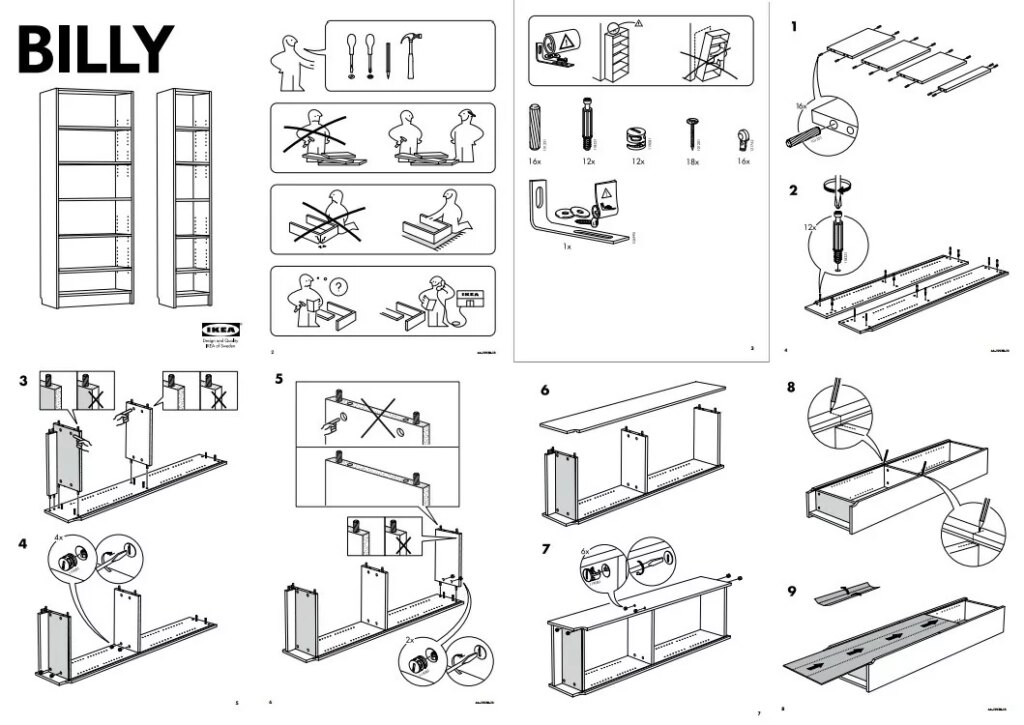
Creating an online course is a pretty huge undertaking. It’s a bit like building one of those super complicated pieces of furniture from IKEA — sure, you could just pour out all the raw materials on your living room floor and try to figure out how everything fits together as you go. But it’s oh so much easier if you have a plan to guide you.
Unfortunately, there has never been a set of instructions for planning your online course.
…Until now! (Ta-da!)
Introducing: Your First Course by Thinkific. Now, you can now follow simple step-by-step instructions to plan, create, and launch your first online course. And thankfully, it’s much more easy to follow than some of the maddeningly-hard-to-decipher illustrations from IKEA…
With the right plan in place, you can make sure you’re creating your course in an organized and strategic way. You can tick the right boxes to make sure your lesson plans are engaging, your students are interested, and (perhaps most importantly) your time isn’t being wasted. The foundation of every great online course starts here — with these five simple steps.
Related: 10 Steps To Creating A Wildly Successful Online Course
5 steps to plan your online course
If you’ve been scratching your head trying to figure out how to get started planning your course, this is a great place to start. Keep reading to see some of the top things you should do when planning your online course…
Define your audience
Define your audience
When you get an idea for a new course, it can be tempting to jump ahead to start planning your lessons. But before you get into the nitty gritty of all that, the first thing you’re going to want to do is define exactly who your course is going to be for.
Why bother defining your audience first? Because this will help you avoid the common mistakes that new course creators tend to make: creating a course that nobody actually wants to buy. By having a clear definition of who your ideal students are and how you plan to help them, you can be sure that you’re creating something valuable (and not just wasting a big ol’ bunch of your time).
Knowing your audience will not only help you sell your course — it will also help you pick the right topic, design the right type of curriculum, and craft the most effective type of lesson plans. In the words of Mike Gospe…
“Whoever understands the customer best, wins.” Mike Gospe, Author, “The Marketing High Ground”
If you have an existing audience
Let’s say you already have an audience of some kind. Whether it’s a social media following, a list of email subscribers, a group of YouTube subscribers, or customers of your business. The first thing you’re going to want to do in this case is to begin to collect information about them.
There are two main types of info you want to seek out:
- Quantifiable insights: These are demographic data points that you can verify, usually using analytics. Try to learn the basics, such as their age, location, gender, and what pieces of content or products they’re most interested in.
- Qualitative insights: These are more in-depth insights around their needs, wants, likes, dislikes, struggles, and interests. You can collect these by randomly selecting some of your customers and sending them a survey or by getting on a Zoom call with them and conducting a short interview. It’s a bit more effort — but the insights will be worth it!
You can use these insights to build a quick profile of what your audience looks like and what their main paint points tend to be. This will be very important for you later on as you start to plan out the rest of your course.
If you’re seeking a new audience
On the other hand, plenty of creators start out without any existing audience. That’s okay — you just want to make sure you know which type of audience you’re seeking out and how it is you’re going to be able to reach them.
Think about where your target audience likes to hang out and try to get a sense of what methods you’d be able to use to communicate with them. Try to reach out to a few individuals within this community to discover your target audience’s goals and problems:
- What results are they hoping to achieve?
- What steps do they need to take to get there?
- What do they struggle with most?
Create a persona for your ideal student
Using the information you collected, you can start to create a customer profile of your ideal student. This is what you’ll use as your north star as you move through the rest of the course planning and creation process. Whenever you run into a tricky spot or a difficult decision, all you’ll have to do is look back at your ideal student and ask yourself: is this something that they would want?
It helps if you think of them as an actual person. So rather than having to plan a course for potentially hundreds of nameless and faceless people, you can just focus on pleasing this one individual.
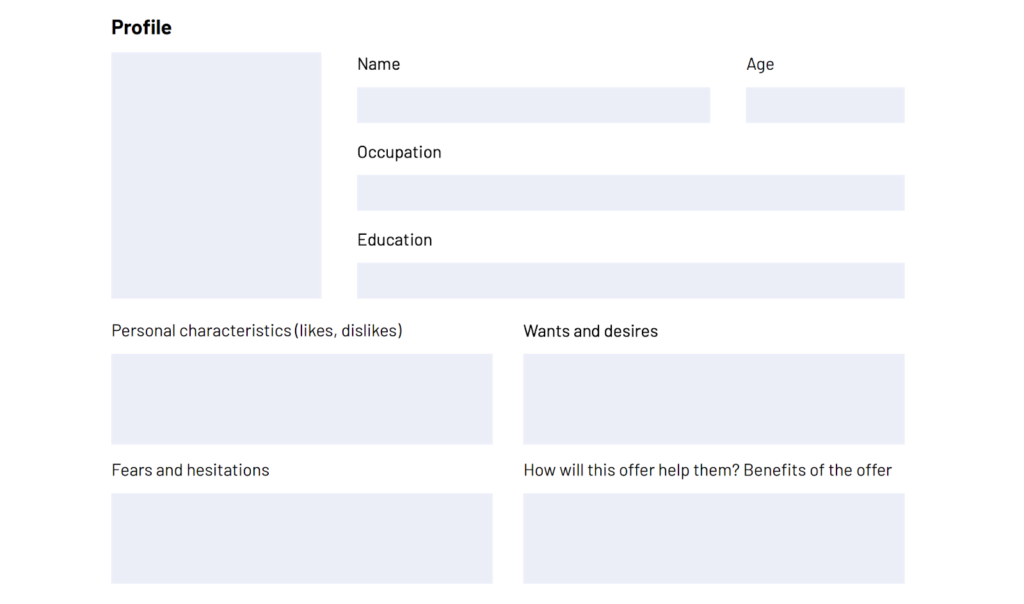
Need help defining your audience? Use this workbook to start crafting your customer profile and build a snapshot of your ideal student. Get prompts for defining key characteristics, fears, wants, aspirations, and more.
Here, you’ll find three templates for to help you define your ideal customer persona.
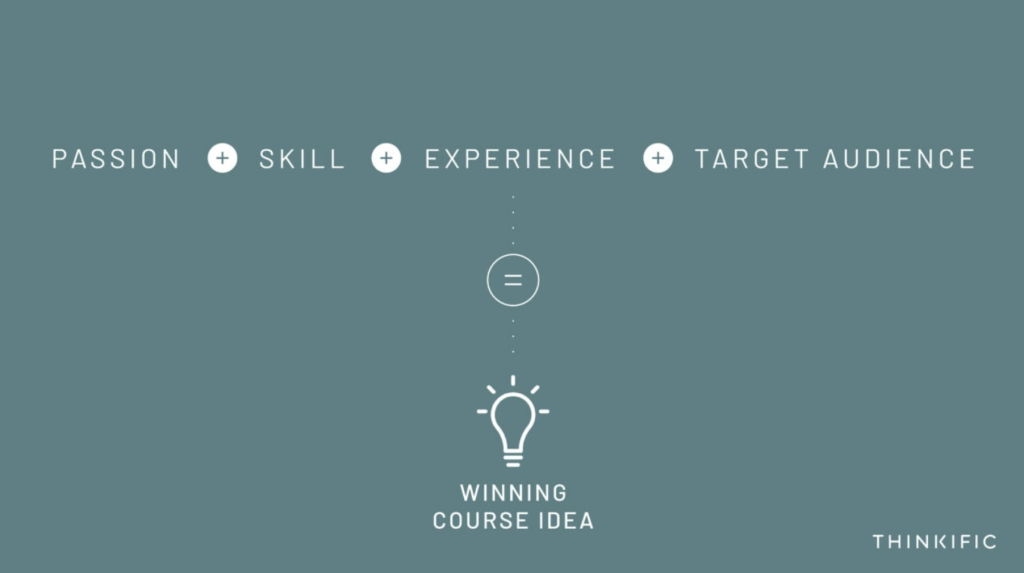
Choose your course topic
Next, you’ll need to decide on a course topic. This sounds deceptively easy, but you’ll want to carefully consider exactly what you want to teach based on your specific areas of expertise, life experiences, and skill sets.
It’s not just all about you though — look back at the ideal student persona and ask yourself where your specific niche of knowledge can best help them. What type of course content can you offer that they would find undeniably useful?
You’ll probably have a few different ideas for courses you could create. So how do you narrow it down to the best possible topic? Ask yourself which idea you’re the most passionate about, which one fits your expertise the best, and which one lines up most ideally with your audience’s problems.
Create a “transformation statement”
It’s pretty rare for students to purchase an online course for the pure sake of knowledge. Most of the time, the reason someone actually hits the “Buy” button is not because of the information they’re hoping to get, but because of the transformation they want to make.
You’re not going to be selling the learning. You’re going to be selling the outcome of the learning.
For creators, marketing funnels should begin with that first transformation. That’s why we like to think of them as something different: Transformation Funnels. When your marketing funnel moves students through a transformation, then you can sell through teaching.
![]()
Related: The Best Educators Are the Best Sellers (They Just Don’t Know It Yet)
So it can be helpful to identify right from the top what that transformation will look like. This can be a super useful exercise to go through when you’re deciding on a course topic. If you have a few candidates, try creating a transformation statement for each of them and see which one sounds the most appealing.
What’s a transformation statement? It’s simple — all you need to do is replace the bolded words in this sentence with ones that apply to your course:
-
My course on TOPIC
… will help AUDIENCE to LEARNING OUTCOME
… so that they can TRANSFORMATION.
If you’re offering a practical course (say, how to learn Excel) then this transformation statement is easy enough to write. But it even works for more conceptual courses. For example, here’s how a creator like KRS Astrology might create a transformation statement for their course on Vedic Astrology Simplified:
My course on Vedic Astrology helps people interested in spiritual knowledge to learn how to read the stars and planets using Indian astrology so that they can become more grounded within the roadmap of the universe.
Writing a transformation statement can help you better focus your course content so that you’re always serving the main goal or goals your students want to achieve.
Downloadable: Topic & Positioning Workbook
Looking for a workbook to help you choose a course topic? This interactive guide can help you hone in on your best ideas and position it for a specific target audience.
Build your course outline
Of course, a transformation won’t just happen right away for students once they purchase your course. There will likely be a number of steps they need to take along the way in order to get there.
That’s why it’s helpful to break down the learning journey into milestones. This will give you a better idea of how much content you need to create, and help to direct the focus of your lesson plans and curriculum.
So to build on the KRS Astrology example from above, creator Kapiel Raaj might start to list all the different skills that students might require in order to get a basic understanding of Vedic astrology. This might be things such as…
- Foundation of Jyotish
- Basics Terminology
- Degrees of Planets
- Zodiac Signs
- Understanding the Birth Chart
- Groups of Houses
- Transits
- Etc.
Once you know the milestones that students need to learn, you’ll have a better idea of how long your course needs to be and how much work you’re going to need to put in.
Downloadable: Content Plan Workbook
Create your course outline using this free content plan workbook. Brainstorm ideas for your student milestones and arrange them in the order that makes the most sense for your learning journey.
Structure your lesson plans
At this point in the planning process, you have an overall idea of what your course is going to accomplish and what learning milestones you want students to hit along the way. The next part of the process involves breaking down each milestone into an individual lesson plan.
You can do this using a Google Doc, whiteboard, or a trust notebook and pen. But it might actually be easiest to hop right into Thinkific to start structuring your lesson plans in there. You’ll be able to create a course skeleton to help you visualize what your course will look like when it’s complete, right in the platform.
And while every lesson may require a different structure, you can use the following general format to hit each milestone…
Part One: The High-Level Lesson
In the high level lesson, you’ll want to cover anything a student needs to know BEFORE jumping in to get their hands dirty. This part of the chapter should focus on the WHAT and WHY before you get into the HOW.
High-level lessons cover the following:
- Any required concepts the students need to understand
- Definitions and other need-to-know details
- Anything you can’t show or talk about during a demo
Part Two: The Hands-On Lesson
In the hands-on lesson, you should be covering how you can put your high-level knowledge into action. This stage isn’t necessary in every course, but it can be a great way to make your course more interactive and useful for students.
Cover the following:
- Demonstrate the how-to portion of your course
- Try and show how you can get one task done
Part Three: The Formative Assessment
At the end of your teaching comes the testing. Typically, you don’t want to give an exam that’s overly tough to complete — you’re just trying to confirm your students are learning. This is key for long-term retention and engagement.
Consider the following when creating a quiz:
- Limit the questions to be about what students just learned
- Ask questions that are easy to recall the answer to
- Make assessments non-graded and explain answers
Part Four: The Learning Aids
After the high-level and hands-on teaching, you should include a learning aid or resource that helps them put their knowledge into action. A cheat sheet, worksheet, workbook, or template can work well here.
Consider the following:
- A reference guide for relevant information
- A community for the student to work on learned skills
- Resources that make the student’s work easier
Downloadable: Lesson Plan Template
Want a handy reminder of how to structure your online lessons? Check out this free guide that includes all the information above, plus additional resources on how to structure your course introduction and conclusion.
Related: How to Use Backwards Design To Create Your Lesson Plan (Template + Steps)
Design your lesson storyboards
By this point, you already have a pretty solid plan for your online course. (In fact, I’d wager that you have a better plan than 95% of other course creators!) But there’s one additional step you can take if you’d like to be extra prepared for creating your course content: a storyboard for each lesson.
Because only a lucky few people are able to simply hit record on their camera and “wing it” when it comes to teaching. For the rest of us, it’s important to have a solid idea of what you want to say and how you want to say it. That’s where instructional design models and storyboarding comes into play.
These are proven ways of teaching effectively that have been scientifically tested and backed by researchers. You can borrow from some of these storyboard templates to make sure your lesson plans are engaging and memorable. For example…
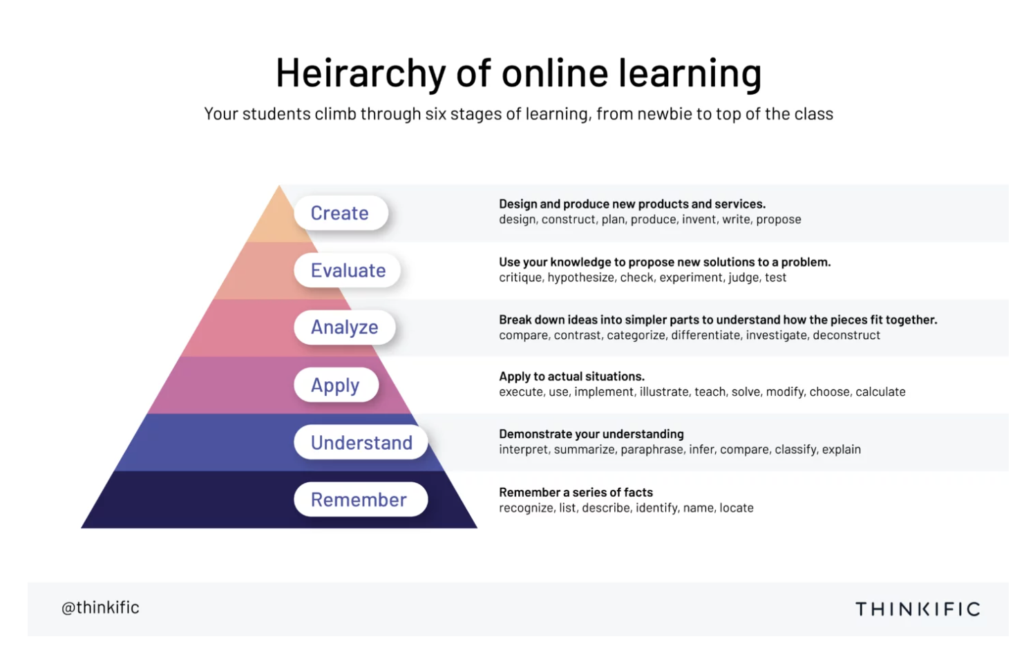
Storyboard Template 1: Bloom’s taxonomy
Bloom’s taxonomy is one of the most well-known storyboard templates. This is a hierarchy of steps that students can go through in order to learn a new skill or concept. It goes: remembering, understanding, applying, analyzing, evaluating, creating.
You can apply this hierarchy to any of your lesson plans in order to make them more effective. So you can start out by helping them remember a concept, then give them a chance to demonstrate their understanding and apply it in actual situation.
Storyboard Template 2: 9 Events of Instruction
Another design model you can follow for your storyboard are the 9 Events of Instruction. This process splits learning into three stages that you can apply to any online lesson or lecture.
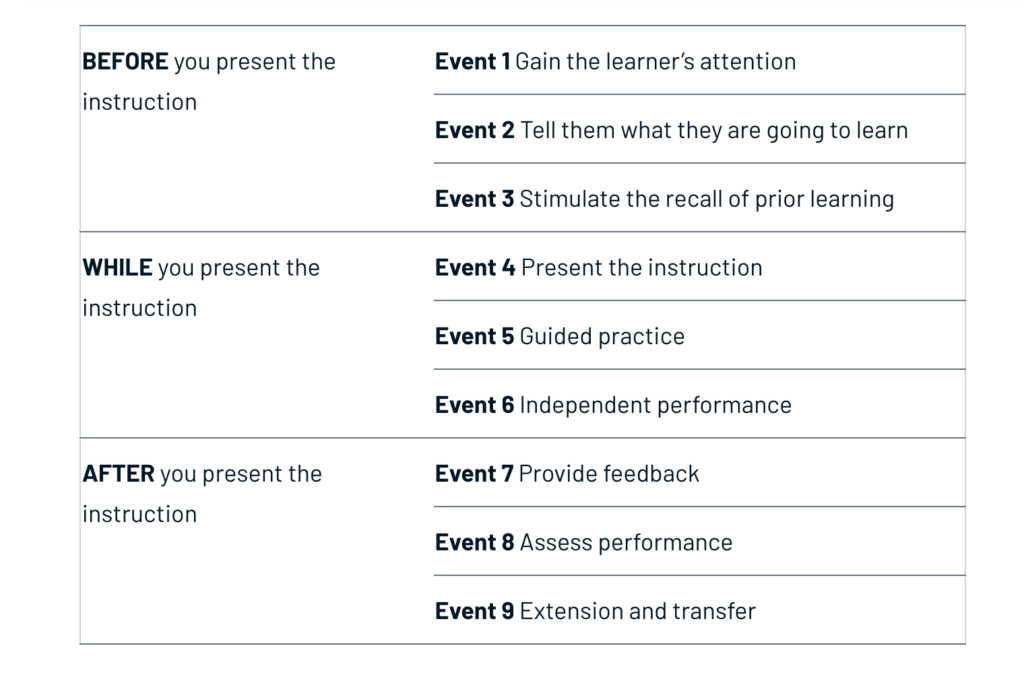
According to this storyboard model, each of the nine events are vital to creating a positive learning experience. So you can’t just “present the instruction” (event 4) and hope for the best — you need to take students through each of the events in order to properly prepare and follow-up with them before and after each lesson.
Storyboard Template 3: 70-20-10
One final storyboard template I’d like to mention here is the 70-20-10 approach. These numbers refer to the different ways people learn, and how much weight you should assign to each of them. The three different categories are…
- 70% of knowledge comes from experience, experiment, and reflection.
- 20% of knowledge comes from working with others.
- 10% of knowledge comes from formal, planned learning.
In most online courses, creators tend to focus on the 10%. But according to this model, you would give your students more value by giving them opportunities to work with others (perhaps by attaching a learning community to your course) or experiment and reflect on the course materials.